
How to Hang Large Framed Wall Art Safely in 2026
Table of Contents
- What You'll Need Before You Start
- How to Find Wall Studs for Hanging Art
- Best Hardware for Heavy Wall Art
- Gallery Height for Wall Art: The 57-Inch Rule
- Calculating Load-Bearing Capacity and Weight Distribution
- Drywall vs. Masonry and Brick Installation
- How to Hang Large Framed Wall Art: Step-by-Step
- Seismic Safety and Digital Visualization Tools
- Frequently Asked Questions
Last Updated: September 13, 2026
What You'll Need Before You Start
Hanging large framed wall art starts with the right tools, not the right spot. Gather a tape measure, pencil, spirit level, stud finder, drill with bits sized to your anchors, and a screwdriver before you touch the wall. At Artist Ray van Buren, every framed piece ships ready to hang with its mounting system included, so half the hardware battle is already solved.
A common mistake is buying anchors before checking the wall. Drywall, plaster, and masonry each demand different hardware, and the wrong choice shows up months later as a sagging corner.
- Tape measure and pencil
- Spirit level (a 60 cm level beats a phone app for accuracy)
- Stud finder or rare-earth magnet
- Drill and masonry bits if you have brick or concrete
- Wall anchors rated for your artwork's weight
- Screwdriver and painter's tape
How to Find Wall Studs for Hanging Art
Finding wall studs means locating the vertical framing behind your drywall, and it's the single most important step for anything heavier than a small print. Studs sit roughly 40 to 60 cm apart and carry the real load.
Stud Finder vs. Magnet Method
A stud finder is faster for most walls, but it can misread thick plaster or foil-backed drywall. The magnet method works differently: it finds the drywall screws holding the wall to the studs, so you mark the stud line directly. Many installers keep a magnet on hand as a backup check.
Reading Drywall Thickness and Substrate
Standard interior drywall runs about 1.25 cm thick, but older homes may have plaster over lath, which behaves differently under load. Knocking on the wall tells you little; a small test hole behind the frame's footprint tells you everything. If the wall sounds hollow and flexes, you are dealing with drywall alone and need anchors.
Best Hardware for Heavy Wall Art
The best hardware for heavy wall art depends on weight, wall type, and whether you can hit a stud. Match the anchor's rated capacity to at least twice your frame's weight, then add margin for the frame's own mass and glass replacement.
| Hardware | Best For | Load-Bearing Notes |
|---|---|---|
| D-rings + screws | Stud-mounted frames | Strongest when both rings hit studs |
| Picture wire | Light to medium frames | Easy leveling, weaker over time |
| Toggle bolts | Hollow drywall | Spread load behind the wall |
| Molly bolts | Medium drywall loads | Good for fixed, single-point hanging |
| French cleat | Large, heavy frames | Distributes weight across the width |
D-Rings vs. Picture Wire
D-rings attached to the frame's back and hung on two screws give the most stable result for large pieces. Picture wire is convenient because it lets you adjust height after hanging, but wire stretches and lets the frame tilt. For anything wide or heavy, D-rings win.
Toggle Bolts, Molly Bolts and French Cleats
Toggle bolts and molly bolts both work in drywall, but they solve different problems. Toggle bolts spread force across a wide backing plate, ideal for heavier loads. Molly bolts are simpler for medium weight. A French cleat, a two-part bracket that locks the frame flush, is the gold standard for large canvases because it distributes weight horizontally and keeps the frame tight to the wall.
Gallery Height for Wall Art: The 57-Inch Rule
Gallery height for wall art follows a simple standard: hang the center of the piece at roughly 145 cm from the floor, which is average eye level. This rule holds in most rooms and keeps a collection visually consistent.
Measure from the floor to 145 cm and mark it lightly. Then measure your frame's total height, divide by two, and add that number to your mark to find where the top edge sits. Museum guidelines on hanging height confirm that consistency across a wall matters more than any single perfect number. In rooms with high ceilings or low furniture, adjust up or down by a few centimeters, but keep every piece on the same wall aligned to the same centerline.
Calculating Load-Bearing Capacity and Weight Distribution
Load-bearing capacity is the total weight your hardware can safely hold, and it should always exceed your artwork's weight by a wide margin. Most practitioners use a 2:1 safety factor, meaning if your frame weighs 30 pounds, choose hardware rated for at least 60 pounds. For anything over 50 pounds, a 3:1 margin is a common pattern among installers who hang heavy pieces regularly.
Estimating Your Frame's Weight
You do not need a scale to get a usable number. A common pattern is to estimate from materials:
- A framed print with glass and a wood frame runs roughly 1.5 to 2 pounds per square foot of frame area.
- A canvas-wrapped piece on a wood stretcher runs closer to 1 to 1.5 pounds per square foot.
- A framed piece with museum glass or acrylic glazing is lighter than standard glass by roughly 30 to 50 percent.
- A metal frame adds weight over a comparable wood frame, often 20 to 30 percent more.
So a 36-by-48-inch framed print with glass (12 square feet) lands somewhere between 18 and 24 pounds. Round up to 30 and you have a working number. If you can, weigh the frame on a bathroom scale, hold it and subtract your own weight. That removes all guesswork.
Reading Anchor and Hook Ratings
Hardware packaging lists a working load limit, not a breaking strength. The working load limit is the number you compare against your frame's weight. A toggle bolt rated for 50 pounds in 1/2-inch drywall means 50 pounds of static load, not 50 pounds of dynamic load. If someone bumps the frame or a door slams, the effective load spikes. That is why the 2:1 margin exists.
Ratings also assume ideal conditions: new drywall, correct hole size, full anchor expansion. Old or crumbly drywall, oversized holes, or a loose anchor can cut real capacity by half or more. When in doubt, size up.
Distributing Load Across Multiple Points
Distribute that load across multiple points rather than one. Two D-rings on studs share the weight; a single hook concentrates it. For wide frames, a French cleat turns the whole top edge into a load-bearing surface, which is why it handles large canvases so well.
A simple rule: never let a single anchor carry more than half the frame's total weight. Two anchors at 50 percent each gives you redundancy, if one loosens, the other still holds. Three or more points is better for anything over 40 pounds.
Check the anchor's printed rating and never assume a screw alone will hold. When the math is close, go heavier on hardware. The cost difference is a few dollars; the cost of a failed hang is a damaged frame, a patched wall, and possibly an injury.
Drywall vs. Masonry and Brick Installation
Drywall and masonry need completely different approaches, and this is where most guides stop short. Drywall is soft and hollow; masonry is dense and unforgiving. The hardware that works in one will fail in the other, often without warning.
Drywall: Hollow-Wall Anchors
For drywall, use toggle bolts or a French cleat anchored into studs. Toggle bolts are the strongest hollow-wall option because the metal bar spreads load across a wide area behind the drywall face. Molly bolts (also called expansion anchors) work for medium loads but rely on the drywall's compressive strength, which varies. Self-drilling anchors are convenient but hold the least weight and should be reserved for light pieces.
If you can hit a stud, do it. A lag screw or heavy-duty wood screw into a stud holds far more than any hollow-wall anchor. Use a stud finder and confirm with a magnet or a small finish nail before committing.
Masonry, Brick, and Concrete: Sleeve and Wedge Anchors
For brick, concrete, or stone, you need a masonry drill bit and a hammer drill, plus anchors designed for solid material. Two anchor families dominate:
- Plastic sleeve anchors (often called expansion anchors): a plastic sleeve expands against the hole walls when the screw is driven. Good for light to medium loads in brick and block. Cheap and easy, but they can loosen over time in soft brick.
- Wedge anchors: a metal wedge expands at the bottom of the hole and bites into the masonry. Much stronger, rated for heavy loads, and the standard choice for large framed art on concrete or solid brick. They are permanent, removing one leaves a hole you cannot reuse.
For hollow brick or block, a sleeve anchor may crush the face. In that case, use a toggle-style anchor designed for masonry, or drill into the mortar joint only as a last resort, mortar is weaker than the brick itself.
Drilling Technique for Masonry
Mark your holes precisely. Use a drill bit matched to the anchor's diameter, a 1/4-inch anchor needs a 1/4-inch bit, not the next size up. Set the hammer drill to hammer mode and drill slowly to avoid cracking the brick face. Keep the bit perpendicular to the wall; angled holes reduce anchor grip.
Drill to the anchor's specified depth, then blow out the dust with a can of compressed air or a bulb syringe. Dust left in the hole prevents the anchor from seating fully and can cut holding strength significantly. Insert the anchor, tap it flush with a hammer, and drive the screw.
Never try to drive a standard drywall screw into masonry; it will strip and fail. Never use a plastic sleeve anchor in a hole drilled too large, it will spin and never expand.
Anchor selection guidance for masonry and drywall
How to Hang Large Framed Wall Art: Step-by-Step
Hanging large framed wall art comes down to measuring twice, marking once, and mounting with hardware matched to your wall. Work slowly, and the frame lands level the first time.
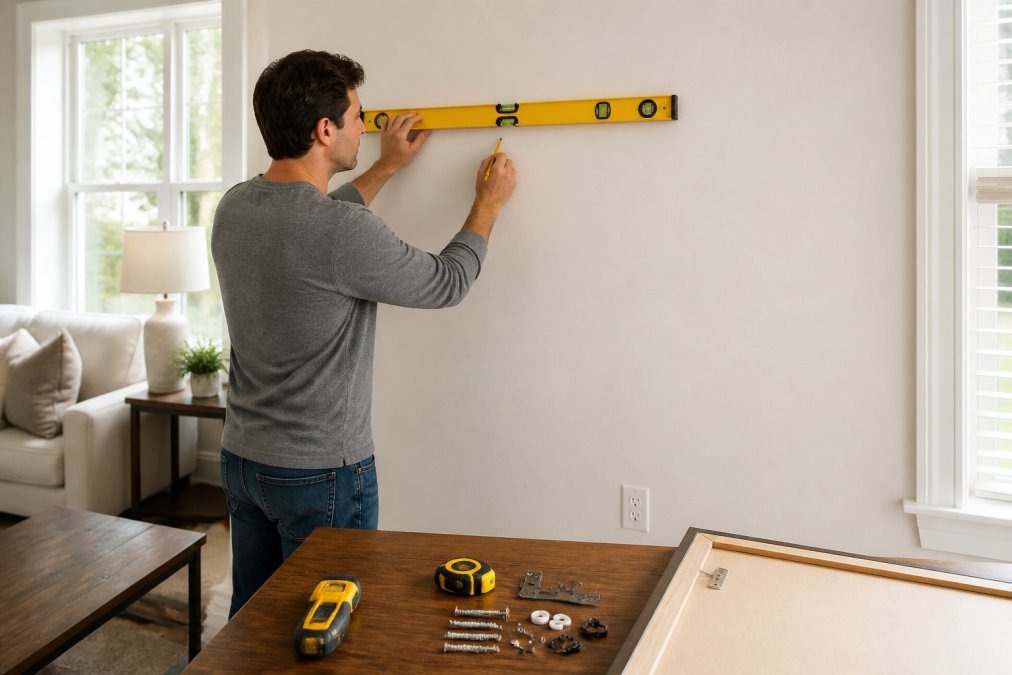
Measuring, Marking and Leveling
Mark your 145 cm centerline, then mark the frame's top edge using the half-height calculation. Hold the frame against the wall or use painter's tape to preview placement. Mark your anchor points, check them with the level, and confirm they land on studs where possible.
Mounting and Final Alignment
Drill your pilot holes, insert anchors, and attach the mounting hardware to the frame first. Lift the frame into place, check level, and tighten. If it tilts, adjust one side by a few millimeters rather than re-drilling.
Seismic Safety and Digital Visualization Tools
Seismic safety matters even in regions with mild activity, because a heavy frame that shifts can crack or fall. Add a small L-bracket or a safety wire from the frame to a wall anchor as a failsafe, and keep heavy pieces off walls above beds or seating where a fall could injure someone.
Digital visualization tools let you preview placement before drilling. Apps that overlay a frame's dimensions onto a photo of your wall remove the guesswork, especially for gallery arrangements with multiple pieces. At Artist Ray van Buren, our large-format framed pieces arrive with the mounting system included, so once you've chosen the spot, hanging is the easy part.
FEMA guidance on securing wall-mounted items recommends anchoring heavy objects as a basic preparedness step, and the same logic applies whether you live in a high-risk area or not.
Frequently Asked Questions
What is the 57-inch rule for hanging wall art?
The 57-inch rule places the center point of your artwork at 57 inches from the floor, which is the average eye level for adults. For large framed wall art, measure the frame height, divide by two, add 57 inches, then mark that spot on the wall. This keeps the piece visually anchored and consistent with gallery height standards used in museums and design studios.
What hardware is best for hanging large framed art?
For heavy pieces, use D-rings attached to the frame's backing paired with two wall anchors rated for at least twice the art's weight. Toggle bolts work well in drywall, while masonry drill bits and sleeve anchors suit brick or concrete. French cleats offer the best weight distribution for very large frames because they spread load across the full width of the mounting bracket.
How do I find a wall stud for heavy framed art?
Use a stud finder set to deep scan mode, then confirm with a small finishing nail or a strong magnet that locates drywall screws. Studs sit 16 or 24 inches apart on center in most US homes. Mark both edges of each stud with painter's tape so you can drill into the center point. If no stud aligns with your layout, use toggle bolts rated for the load.
Can I use adhesive strips for large framed wall art?
Adhesive strips are not safe for large or heavy frames. They work for lightweight posters under a few pounds, but a framed canvas with glass or plexiglass can exceed 10 pounds. For anything beyond a small print, use wall anchors, toggle bolts or a French cleat. This protects both your art and your drywall from sudden failure.
Hanging large framed wall art safely is really a question of matching hardware to your wall and trusting the math over your eye. Artist Ray van Buren makes that easier with museum-quality framed pieces on sustainably sourced oak and ash, supplied ready to hang with an unbreakable plexiglass front and a mounting system in the box. Add to cart and let the wall do the rest.